
What Is a Multi-Unit Listing?
A MultiUnit listing is a single parent property that has more than one bookable space. Instead of creating a separate property for every room in your guesthouse, hotel, or apartment building, you create one parent property and add bookable units or room types underneath it.
Think of it like a building directory: the building itself is the parent, and each apartment, room, or room type is a unit. Guests book the units, while the parent property holds the shared address, property-level photos, amenities, house rules, and channel connection context.
SympleHost still separates manual listings into two setup types:
- Standalone — one bookable property or unit, such as a whole villa, house, apartment, or single room.
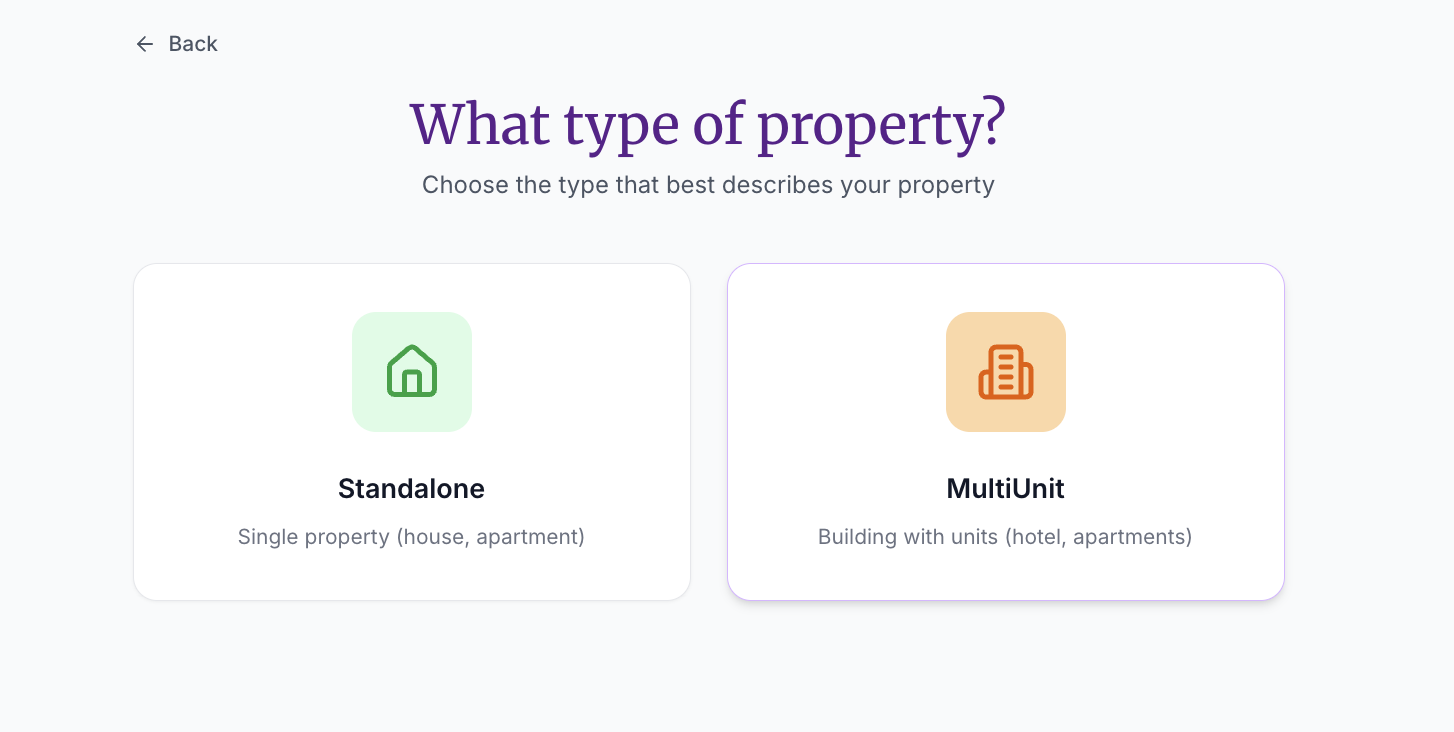
- MultiUnit — one parent property with room types or units underneath it, such as a hotel, guesthouse, hostel, lodge, or apartment building.
If you are looking for the old “single unit” idea, choose Standalone in the product. If the property has more than one bookable room or unit at the same address, choose MultiUnit.
Examples of multi-unit listings:
- A guesthouse with five bedrooms, each rented separately
- An apartment building where each flat has its own booking calendar
- A hotel or lodge with different room categories (Standard, Deluxe, Suite)
When to Use Multi-Unit vs. Standalone
| Scenario | What to Choose |
|---|---|
| One self-contained property (entire house, single apartment) | Standalone |
| One bookable room or unit with its own calendar | Standalone |
| Multiple bookable rooms or units at one address | MultiUnit |
| A hotel, hostel, lodge, or guesthouse with room types | MultiUnit |
| You list on Booking.com and have more than one room or room type | MultiUnit (Booking.com expects a hotel/property → room type → rate plan structure) |
⚠️ Important for Booking.com hosts: Booking.com’s system is built around hotel/property containers with rooms and rate plans underneath. If your Booking.com property has multiple rooms or room types, create it in SympleHost as MultiUnit so each Booking.com room can map to the right SympleHost unit.
If your Booking.com property is genuinely a single bookable unit, Standalone can still be used. During channel mapping, SympleHost treats that listing as the one unit for the Booking.com connection.
Before You Start
Make sure you have:
- Your company profile set up — currency and timezone should be correct, since they affect pricing and booking times. See: Setting Up Your Company Profile.
- A list of your room types or units — how many you have, what bed setup each uses, and maximum guest capacity
- Photos ready — both property-level photos (exterior, common areas) and unit-level photos (individual rooms). Supported formats: JPEG, PNG, or WebP, up to 10MB per image.
- Booking.com access ready if you plan to connect Booking.com — you need access to the Booking.com Extranet and the property’s numeric Hotel ID.
- Channex.io selected as the connectivity provider in Booking.com before you complete the Booking.com connection in SympleHost.
How to Create a Multi-Unit Listing
Step 1: Start a New Property
- Click Listings in the sidebar.
- Click + New Property in the top right.
- Select Manual.
- You’ll see two options: Standalone and MultiUnit. Select MultiUnit.
Step 2: Fill In the Parent Property Details
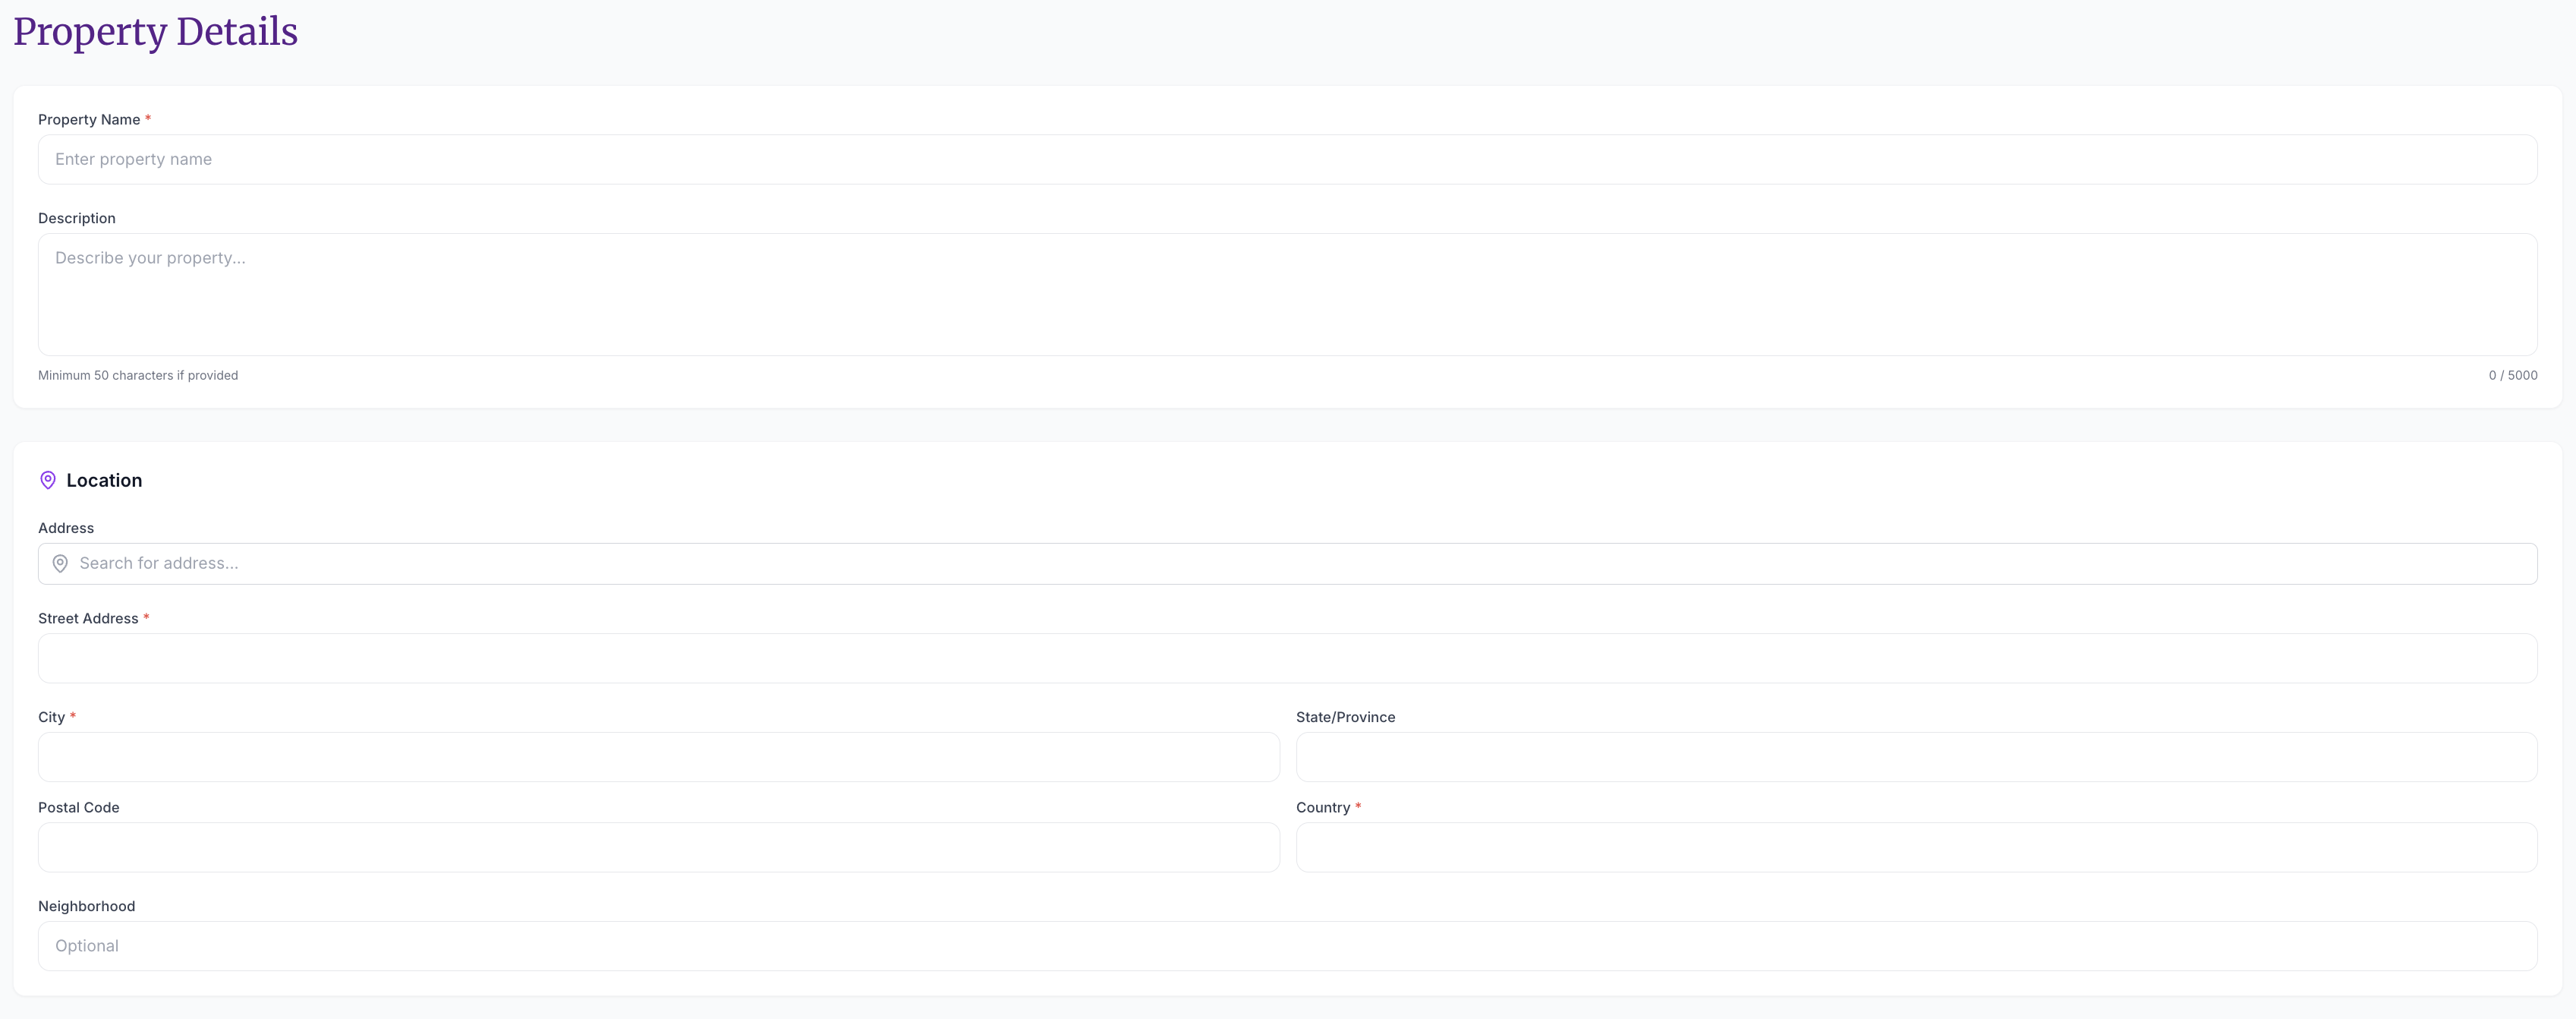
The parent property represents the building, hotel, guesthouse, or complex as a whole. Units you add later sit underneath this parent and share the property-level details.
-
Enter a Property Name — this is the name guests see. For example, “Seaside Guesthouse” or “Maple Street Apartments”. (Minimum 3 characters.)
-
Add a Description of the property overall — not individual rooms. Describe the building, the neighborhood, what makes it special. (Minimum 50 characters, up to 5,000.)
-
Enter the Location:
- Start typing in the Address field — it will autocomplete using Google Maps.
- Once you select an address, the Street Address, City, Country, and Postal Code fields fill in automatically.
- Your Timezone is also detected from the address. Double-check it’s correct.
- Optionally add a Neighborhood name (e.g. “Old Town” or “Beachfront”).
- Upload Property Images — drag and drop or click to browse. These should be photos of the building exterior, common areas, lobby, pool, or surroundings. Put the strongest guest-facing photo first so it becomes the main thumbnail.
💡 Tip: You’ll add room-specific photos later when you create each unit. Keep property-level photos focused on shared spaces.
-
Select Amenities that apply to the entire property — things like Wi-Fi, parking, swimming pool, or reception desk.
-
Set your House Rules:
- Toggle on or off: Smoking Allowed, Pets Allowed, Parties Allowed, Suitable for Children
- Add any Additional Rules in the text area (e.g. “Quiet hours after 10pm”)
-
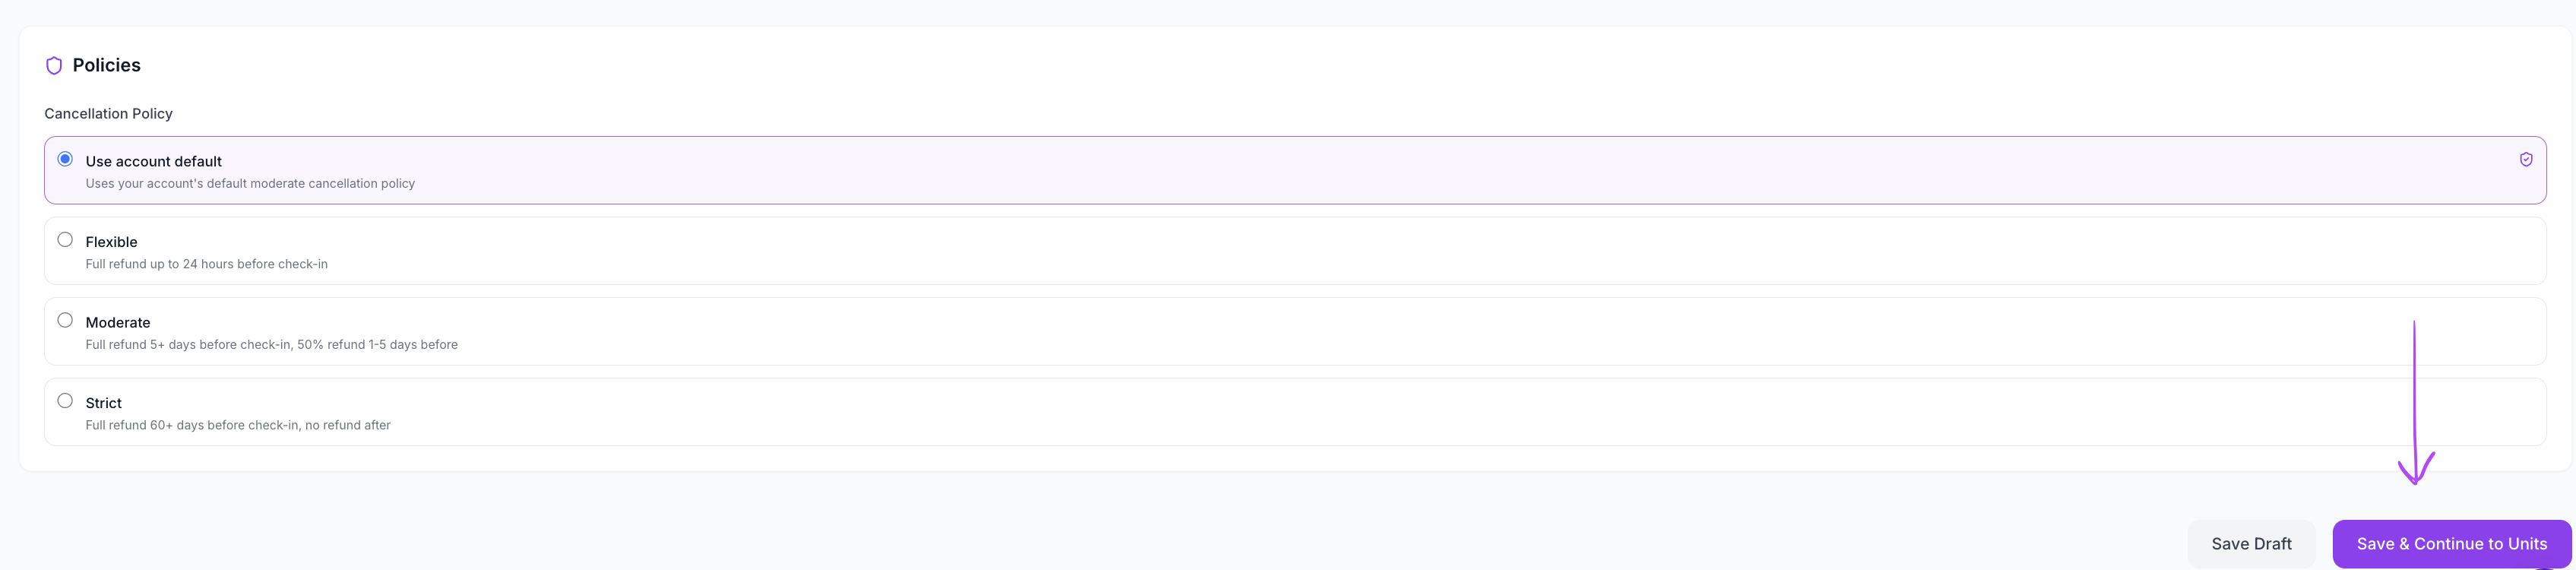
Choose a Cancellation Policy — either inherit your account default or select a specific policy.
-
Set your Check-in Time (default: 3:00 PM) and Check-out Time (default: 11:00 AM).
-
Click Save & Continue.
Step 3: Add Your Units
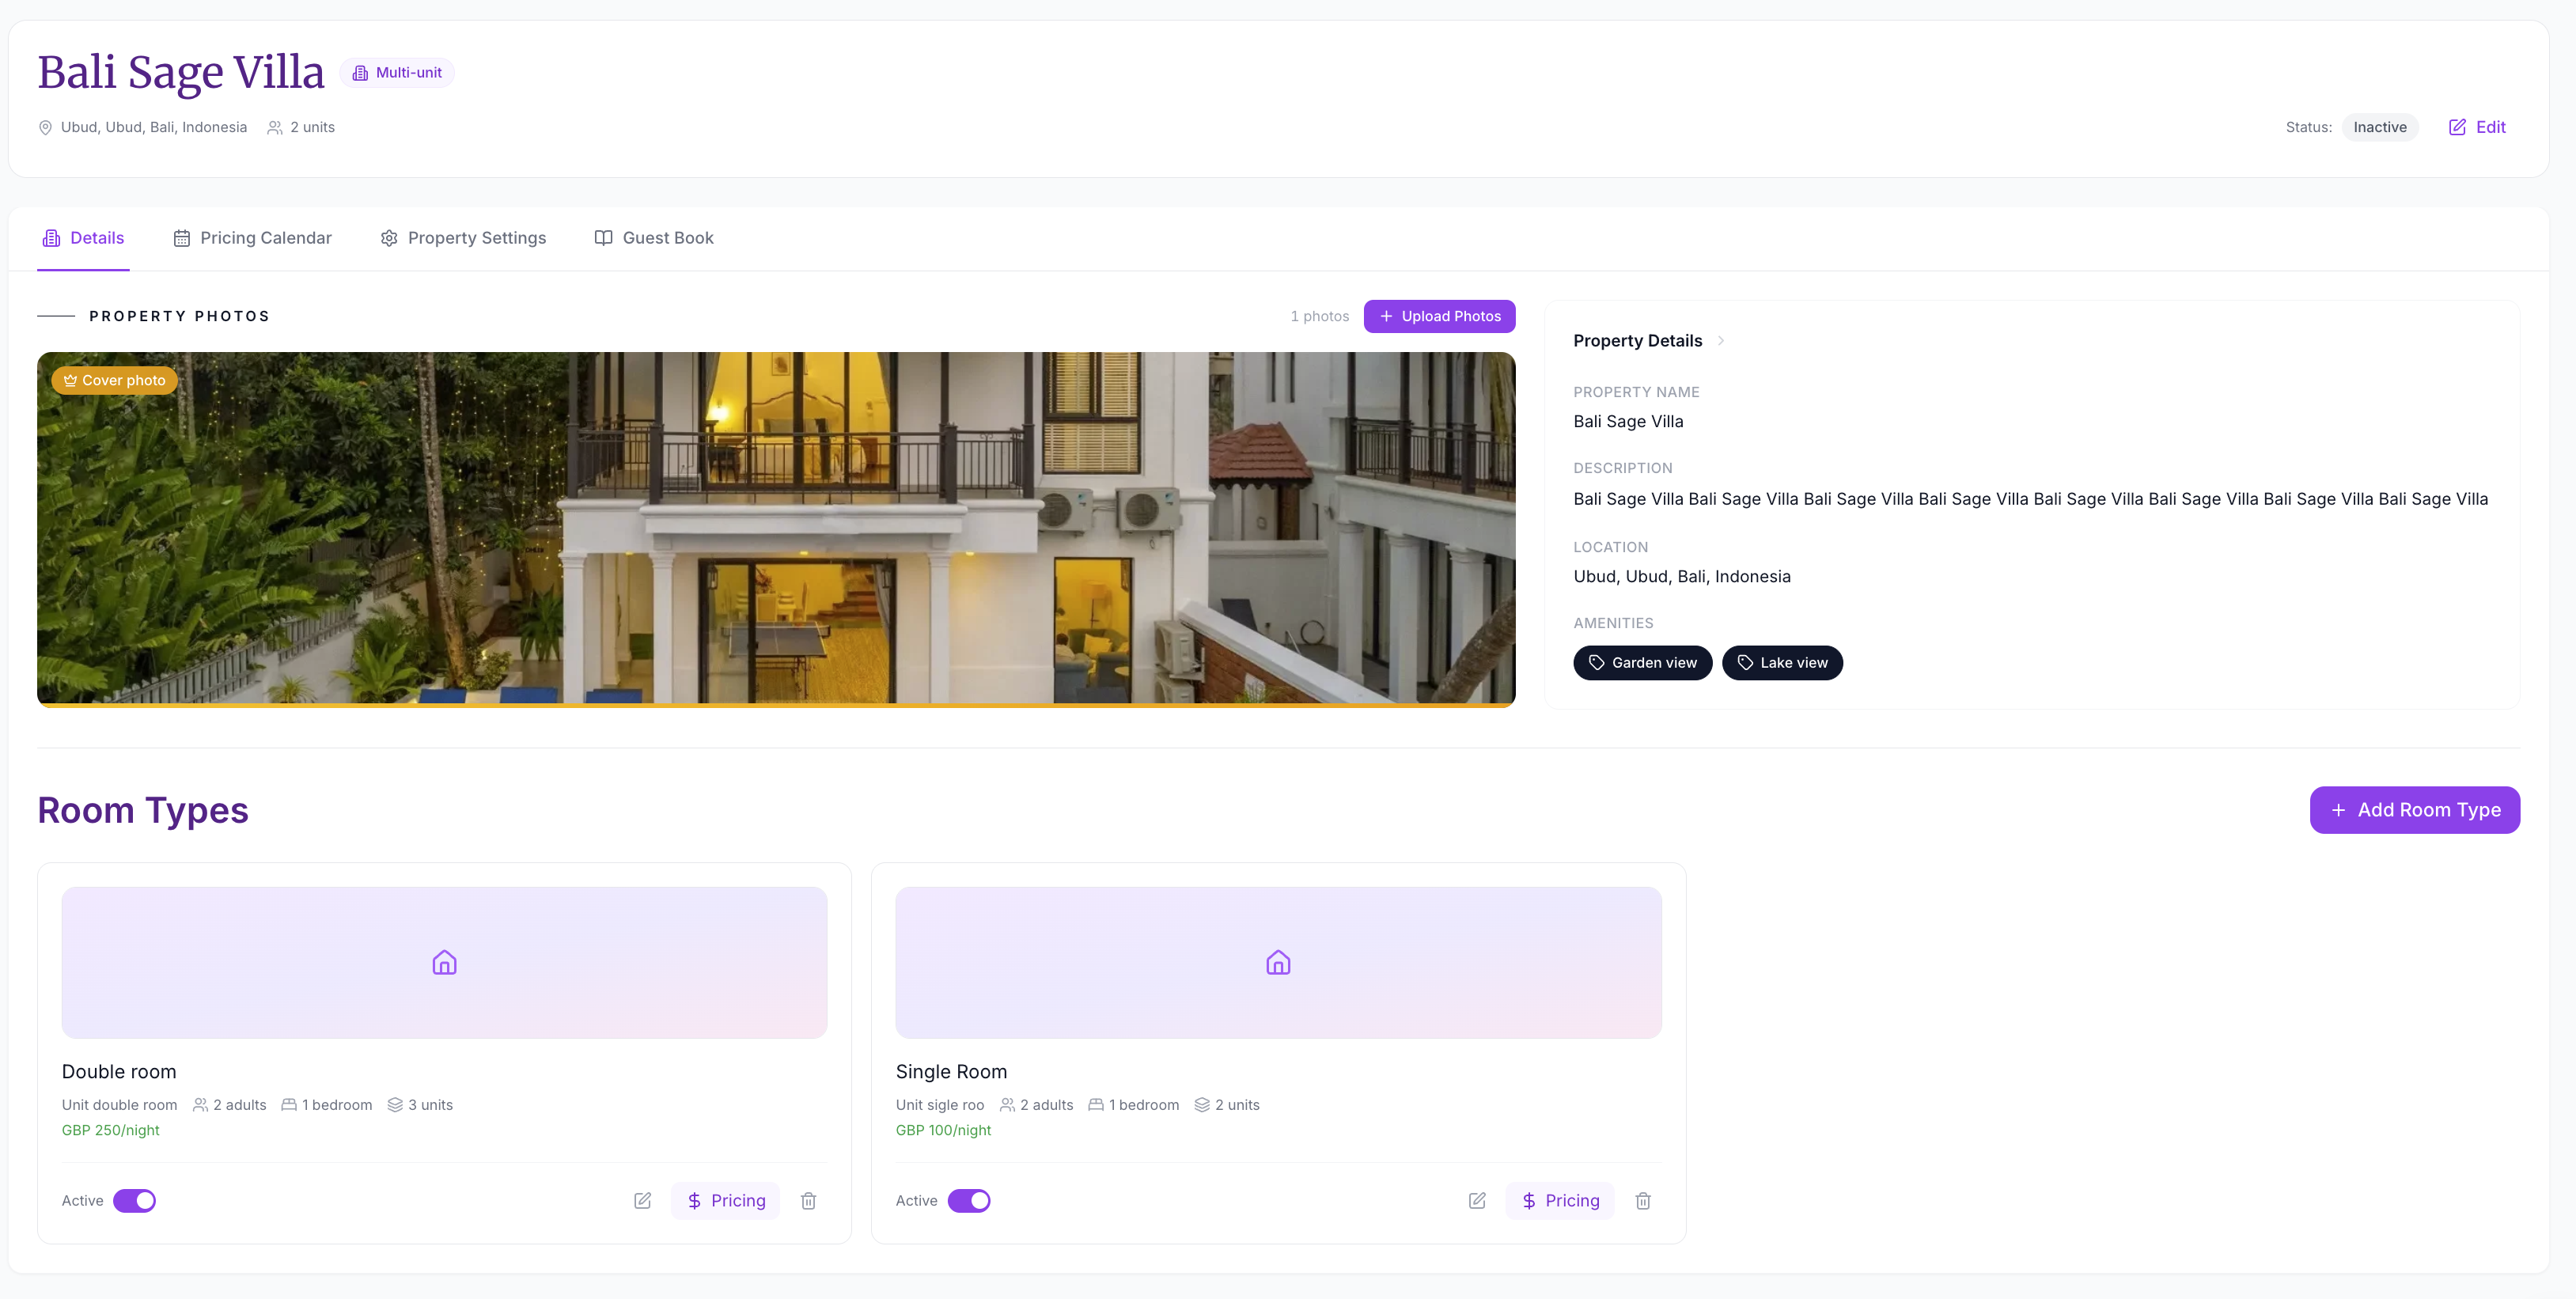
After saving the parent property, you’ll land on the property detail page. Use the Units tab to add the bookable units or room types underneath the parent.
- Click + Add Unit.
- Fill in the unit details:
| Field | What to Enter | Example |
|---|---|---|
| Unit Name | The room type or unit name guests and your team will recognize | ”Deluxe Double Room” or “Studio A” |
| Unit Number | The room or unit identifier. This is required. | ”101”, “A”, “Ground Floor” |
| Quantity / Unit Count | How many identical units of this type exist (default: 1) | 5 (if you have five identical standard rooms) |
| Description | What makes this unit unique (optional) | “Corner room with sea view and private balcony” |
-
Set the Guest Capacity using the +/- buttons:
- Max Adults (minimum 1, up to 20)
- Max Children (0–10)
- Max Infants (0–5)
-
Set the Bedroom Details:
- Bedrooms (0–10)
- Bathrooms (0–10)
-
Configure the Beds — this is especially important if you connect to Booking.com:
- Select a Bed Type from the dropdown: Single, Twin, Double, Queen, King, Super King, Bunk, Sofa, or Futon
- Set the Count (e.g. x2 for two single beds)
- Click + Add Bed if the unit has more than one type of bed (e.g. 1 Queen + 1 Sofa Bed)
⚠️ Important: If you plan to connect to Booking.com, bed configuration is required. Booking.com rejects listings that only have a generic bed count without specifying bed types. Always fill in the specific bed types for each unit.
-
Upload Unit Images — photos of this specific room or unit. The first image becomes the unit’s primary photo.
-
Click Save & Continue to set up pricing for this unit.
Step 4: Set Pricing for Each Unit
After saving a unit, SympleHost takes you to that unit’s Pricing page.
- Set the Base Nightly Rate for this unit.
- Optionally add seasonal pricing, length-of-stay discounts, guest-count pricing, taxes, fees, or other pricing settings available for that unit.
- Click Save.
Repeat Steps 3 and 4 for each additional unit or room type. Use the parent property’s Pricing Calendar tab when you need to manage calendar pricing and availability across the MultiUnit property.
See How to Set Up Your Pricing & Rate Rules for the full pricing guide.
💡 Tip: If all your units are identical (e.g. five standard double rooms), create one unit with Quantity = 5 rather than creating five separate units. This saves time and keeps your setup clean.
Step 5: Review and Activate
-
Go back to the property page and click the Units tab.
-
Check that each unit has:
- At least one photo
- A complete bed configuration
- A base nightly rate set
- The Active toggle (the on/off switch next to each unit) switched on
-
Each unit card shows its status at a glance: the nightly rate in green if pricing is set, or a gray “No pricing” label if it’s missing.
-
Once everything looks good, make sure the units you want to sell are Active. Also check the parent property’s channel/direct-booking settings before publishing externally.
Connect the MultiUnit Property to Booking.com
Once your MultiUnit listing is saved, priced, and active:
- Open Channel Manager from the sidebar, or open the property and go to the Channels tab.
- Choose Booking.com and click Connect.
- In the Booking.com Extranet, make sure Channex.io is approved as the connectivity provider. Booking.com only allows one connectivity provider at a time.
- In SympleHost, enter the Booking.com Hotel ID and click Connect & verify.
- SympleHost loads the rooms and rate plans from Booking.com.
- Map each Booking.com room to the correct SympleHost unit.
- Map the relevant Booking.com rate plan to the correct SympleHost pricing setup.
- Skip any Booking.com rooms you do not want to connect yet.
- Confirm the mapping and start sync.
SympleHost then syncs availability, rates, restrictions, and reservations through Channex.io. Bookings made on Booking.com flow back into SympleHost automatically.
💡 Tip: Create and price the MultiUnit property first, then connect Booking.com. Mapping is much easier when every room type already exists in SympleHost with its bed setup, capacity, photos, and base pricing.
Manage Channel Markups
After a channel is connected, use Channels or Channel Manager to check its status and manage markups.
For Booking.com hotel-style connections, markups are managed at the mapped room/listing level. Use the Markup control on the connected channel row or room row to add a percentage markup where needed.
This is useful if you want the OTA price to be higher than your direct booking price to cover commission or channel costs.
Troubleshooting
Booking.com sync failed with “Missing bed configuration”
Open each unit and make sure the Beds section has specific bed types selected (e.g. “1 Queen, 1 Sofa Bed”). A generic “2 beds” count isn’t enough — Booking.com requires exact bed types.
Booking.com shows the wrong number of available rooms
Check the Quantity value on each unit. This is the total inventory Booking.com sees. Actual availability is managed by the calendar — if some units are booked, the available count adjusts automatically.
I can’t map my Booking.com rooms
Make sure your property is saved as a MultiUnit listing, the units are active, and each unit has bed configuration and pricing. Then return to Channel Manager → Booking.com and continue the mapping flow.
Booking.com says another provider is connected
Open the Booking.com Extranet and change the connectivity provider to Channex.io. If another channel manager is still connected, disconnect it first in Booking.com before retrying in SympleHost.
I entered the Hotel ID but rooms are not loading
Check that the Hotel ID is numeric and belongs to the Booking.com property you are trying to connect. Also confirm that Channex.io has been approved in the Booking.com Extranet.
A unit shows “No pricing” in the unit list
Click the Pricing icon (the dollar sign) next to the unit to go to its pricing page and set a base nightly rate. Units without pricing can’t be booked.
I want to delete a unit I added by mistake
Click the Delete icon (trash can) next to the unit. You’ll see a confirmation dialog — confirm to remove it. If the unit has existing bookings, contact support for help.
Key Takeaways
- Multi-unit = one parent property with individual bookable units underneath
- Use Quantity > 1 for identical units instead of creating duplicates
- Bed configuration is mandatory for Booking.com — always specify exact bed types
- Create, price, and activate the property first, then connect Booking.com from Channel Manager
- Booking.com mapping connects remote rooms and rate plans to your SympleHost units
- Use channel markups when you want OTA rates to include extra margin or commission coverage