
The SympleHost calendar is the fastest place to work by date. Use it to see what is open, booked, blocked, restricted, or waiting for payment action across your properties.
From the calendar you can:
- review bookings, blocked dates, nightly rates, and minimum-stay rules
- search or filter properties so you only see the listings you need
- update pricing for one date or a date range
- update availability, minimum nights, maximum nights, and check-in/check-out restrictions
- block dates for maintenance, owner stays, or internal holds
- create a new direct reservation from an available date
- open reservations, message guests, record payments, release deposits, or confirm eligible direct reservations
- export pricing data for review outside SympleHost
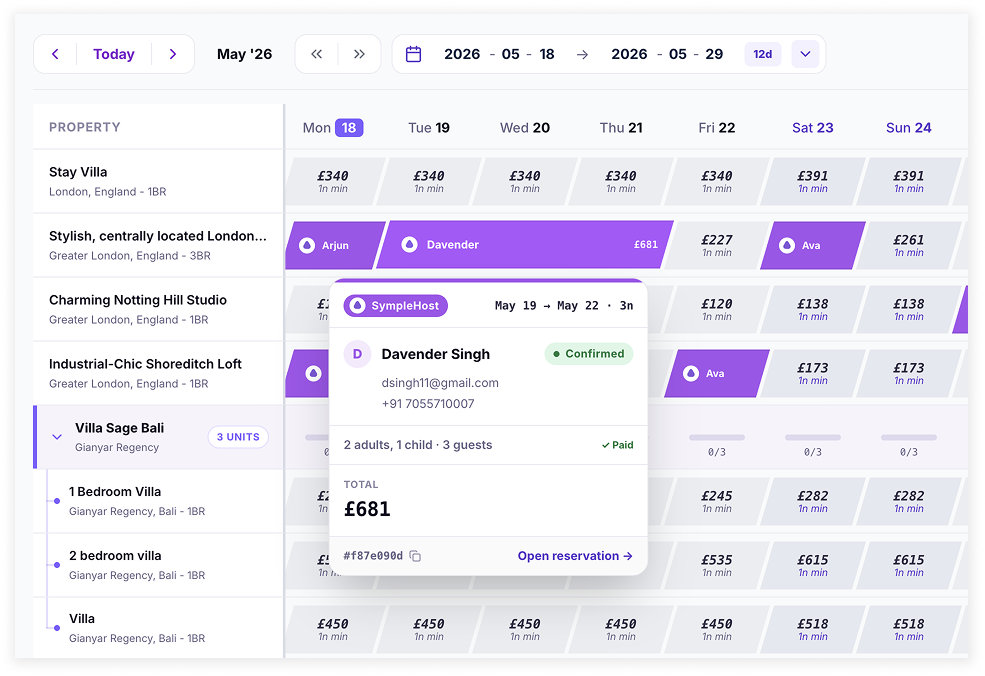
Open the Property Calendar
- Click Calendars in the sidebar.
- Open the Properties calendar.
- Use the property rows on the left and the dates across the top to scan your portfolio.
If your account also uses service bookings, you may see a separate Services calendar. Use Properties for accommodation availability, pricing, reservations, blocks, and direct bookings.
Understand the Top Bar
Use the controls above the grid to move quickly:
| Control | Use it for |
|---|---|
| Previous / Today / Next | Move the calendar window without changing the rest of your filters. |
| Date range | Choose a custom range or presets such as the next 14, 30, or 90 days. |
| Search | Find a property by name or city. |
| Property filter | Show all properties or only selected properties. |
| Deposits to release | Review held deposits that may need to be released or deducted. |
| Export | Download pricing and restriction data for the selected range. |
You can also reorder property rows so the listings your team checks most often stay near the top.
Read the Calendar Grid
Each row is a property. Each column is a date.
| Calendar item | What it means |
|---|---|
| Open price cell | The date is available to manage. It may show nightly rate and minimum stay. |
| Reservation bar | A guest booking exists across those dates. The bar can show source, guest name, amount, and status. |
| Pending indicator | The booking still needs confirmation or payment attention. |
| Payment stripe | For direct/SympleHost bookings, the calendar can show paid, pending, deposit paid, partial, overdue, unpaid, refunded, or held-payment states. |
| Blocked bar | The date is unavailable because of a manual block, owner stay, maintenance, linked calendar, migration import, or channel sync. |
| Unavailable cell | The date cannot be booked from the calendar. |
| xN / UNITS badge | For listings with Number of units above one, shows the unit total next to the property name (for example x5 or 6 UNITS). |
| Calendar-link pill | Shows when a listing is connected to related calendar inventory. |
Hover over rate cells to check price details where available. Click an open cell, reservation bar, or blocked bar to open the relevant actions.
Work With Guesthouses and Boutique Hotels
If your guesthouse or boutique hotel is one Standalone property with several identical rooms, set Number of units on the listing. The calendar uses that number as your inventory for each night: every booking or block uses one unit, and the date stays bookable until all units are taken. See Setting Up a Guesthouse or Boutique Hotel with Several Rooms.
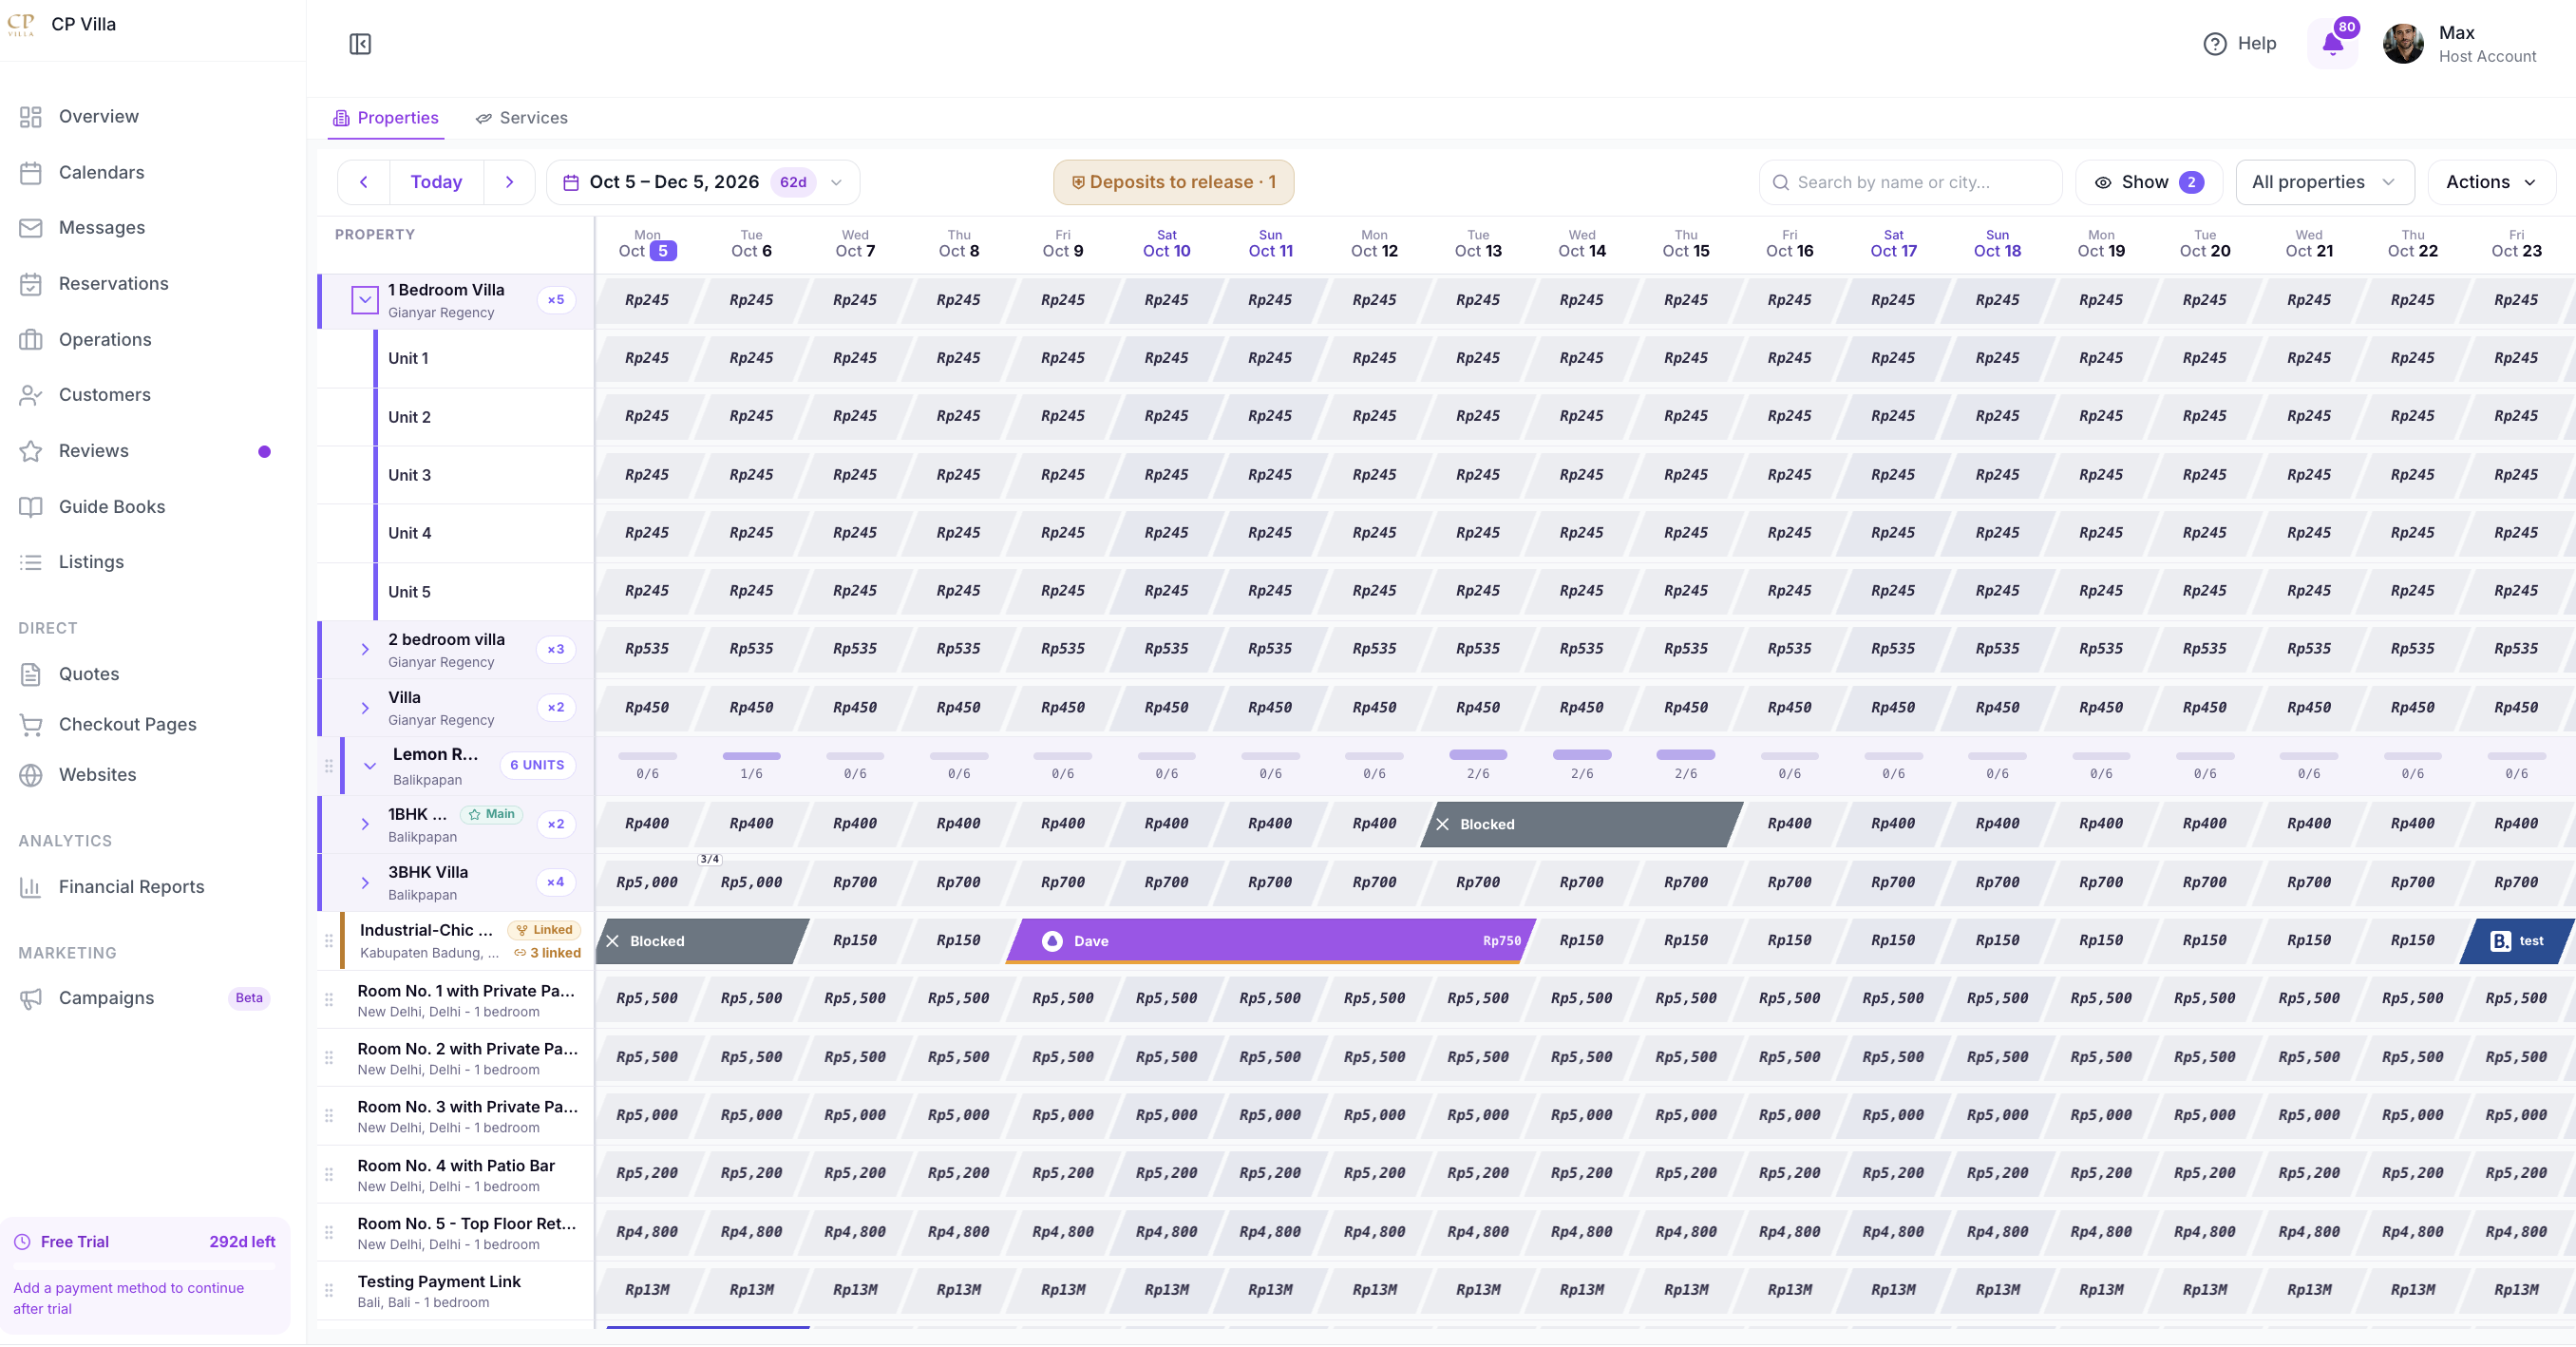
For these listings the calendar can show:
- expandable Unit 1, Unit 2, … lanes under the property
- xN or UNITS badges for the total inventory
- per-date availability ratios such as 0/6 or 2/6
You can also:
- see how many units are still available on each date
- block a specific number of units for maintenance or owner use
- create direct reservations while units are still available
- manage pricing and stay rules for the property as a whole
Update an Open Date
Click an open date cell to open calendar actions.
Pricing
Use Pricing to update the nightly rate for a single date or date range.
You can:
- set a base nightly rate
- apply a percentage change
- choose a start and end date
- review how many dates were updated or skipped
If a date cannot be updated, SympleHost will skip it rather than silently changing something that should stay protected.
Availability
Use Availability to update stay rules for one date or a range:
- minimum nights
- maximum nights
- whether guests can check in
- whether guests can check out
- available unit count for listings with Number of units above one
If you mark a date as unavailable, SympleHost creates the appropriate block or restriction for that date. If you are updating a large range and the platform asks you to shorten it, split the update into smaller ranges.
Block Dates
Use Block day when the property should not be bookable for internal reasons.
Common block reasons include:
- maintenance
- owner stay
- blocked
- other internal holds
Add notes so your team understands why the block exists. For a listing with Number of units above one, choose how many units should be blocked.
New Reservation
Use New reservation to create a direct booking from the calendar. SympleHost pre-fills the property and check-in date from the cell you selected.
Keyboard Shortcuts
When the date popover is open on an available date, use:
| Shortcut | Action |
|---|---|
| P | Pricing |
| A | Availability |
| M | Block day |
| R | New reservation |
Coming soon: drag-to-select multiple cells will make it faster to select several dates directly on the calendar before applying updates. Until that release is visible in your account, use the start and end dates inside Pricing, Availability, or Block day to apply changes across multiple dates.
Create a Direct Reservation from the Calendar
Use this for bookings that come through your direct website, phone, WhatsApp, email, repeat guests, or another non-OTA source.
- Click an open date cell.
- Choose New reservation.
- Confirm the property, check-in date, and check-out date.
- Add or select the guest.
- Enter guest count, notes, and reservation details.
- Review the price.
- Add a discount if needed.
- Record any money already received, including stay payment or security deposit.
- Save the reservation.
If the reservation is created but the payment-recording step fails, open the reservation page and record the payment from there.
Manage an Existing Booking
Click a reservation bar to open booking actions.
Depending on the booking source, status, payment state, and your permissions, you may see:
- Open reservation — open the full reservation detail page.
- Message guest — open the guest conversation.
- Record payment — record cash, bank transfer, or another offline payment.
- Release deposit — return or deduct a held security deposit.
- Confirm Reservation — confirm an eligible direct reservation, record the outstanding payment, and send the guest confirmation email.
- Mark Deposit Paid — record the deposit and hold the dates without confirming the reservation or emailing the guest.
Payment and deposit actions are mainly for direct/SympleHost reservations. OTA bookings usually follow the OTA or channel payment rules.
For deeper reservation work, use the Reservations module. It is better for filtering bookings, checking guest details, reviewing the payment timeline, editing booking details, and investigating issues.
Manage Blocked Dates
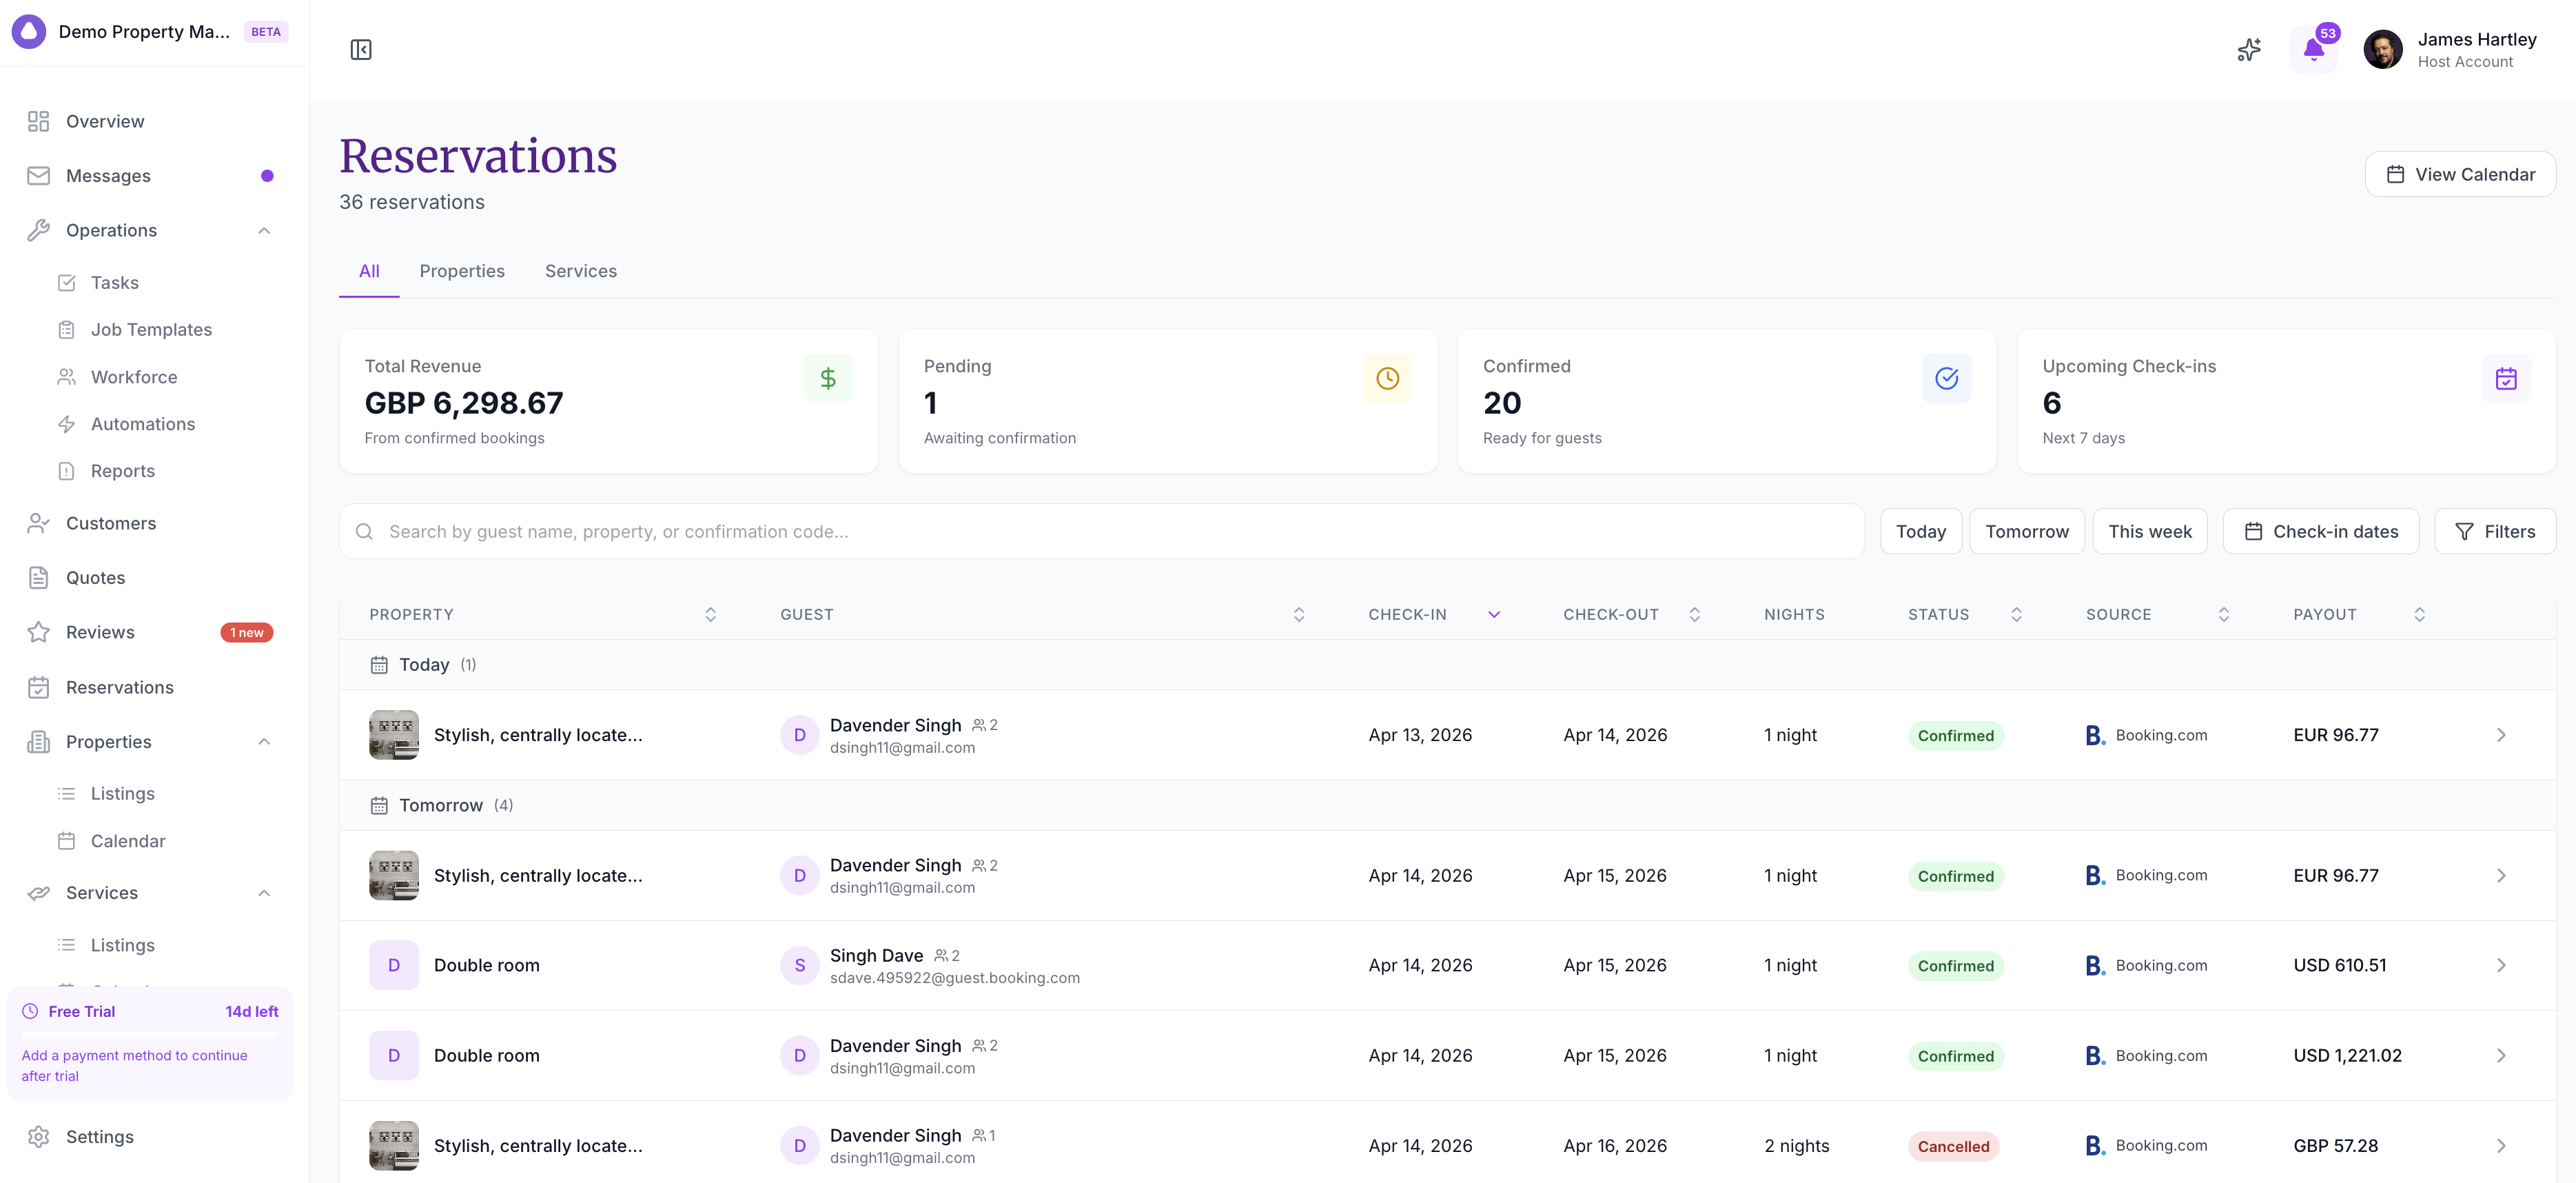
Click a blocked bar to understand why the date is unavailable.
Blocked dates can come from:
- Manual blocks created by your team
- Maintenance or owner stays
- Imported blocks created during migration or listing import
- Linked calendars or linked listing relationships
- Channel-synced blocks from an OTA or channel manager
For manual blocks, you can usually edit the reason, notes, dates, and number of rooms blocked. You can also unblock the date.
Be careful with linked or channel-synced blocks. If the connected OTA or linked calendar still says the date is unavailable, the block may return on the next sync.
Use Deposits to Release
When there are held deposits that may need action, the calendar can show a Deposits to release indicator in the top bar.
Open it to review reservations with deposits ready for follow-up. From there, go to the reservation and release or deduct the deposit according to your process.
Export Pricing
Use Export when you need to review calendar data outside SympleHost.
The export is useful for:
- checking rates over a date range
- comparing minimum-stay rules
- sharing pricing data with owners or internal teams
- auditing updates after a pricing change
Choose the range and properties you want first, then export.
Calendar vs Reservations
Use Calendars when you are working by date:
- checking availability
- updating rates or restrictions
- blocking maintenance dates
- creating a direct booking from an open date
- taking quick payment or confirmation actions
Use Reservations when you are working by booking:
- searching all reservations
- filtering by status, property, channel, or date
- checking guest details
- reviewing payment status and activity
- editing or cancelling a reservation
- investigating a booking issue
The full reservation workflow is covered here: Checking Reservations in the Reservations Module.
Troubleshooting
A date became blocked again after I unblocked it
Check whether the block came from a linked calendar or channel sync. If the source OTA or linked calendar still has the date blocked, SympleHost may receive the block again during the next sync.
I cannot see payment actions on a booking
Payment actions depend on the booking source, reservation status, payment setup, and your role permissions. OTA bookings often follow the OTA’s payment rules, while direct/SympleHost bookings can support manual payment recording and deposit workflows.
I created a reservation but payment was not recorded
Open the reservation detail page and record the payment from there. This can happen if the booking was created successfully but the payment-recording step failed.
The calendar feels too busy
Use search, property filters, a shorter date range, or property row reordering so the listings your team checks most often stay near the top.