
Sign up, set up your profile and workspace, invite your team, and verify your email — six steps, around ten minutes, and SympleHost is yours.
TL;DR: Onboarding is a six-step wizard — sign up, set up your profile, enter company info, tell us your scale, invite your team (optional), and verify your email. Anything you skip you can come back to from Settings later. Once you’re in, swap in your profile photo (Settings → Profile) and workspace logo (Settings → General → Workspace Branding) — that’s what makes the platform feel branded as your business, not generic software.
What Is the Onboarding Flow?
When you first sign up for SympleHost, you’ll walk through a short setup wizard — six steps that get your account ready to use. You only do this once, and you can skip optional steps and come back to them later.
How to Create Your Account
Step 1: Sign Up
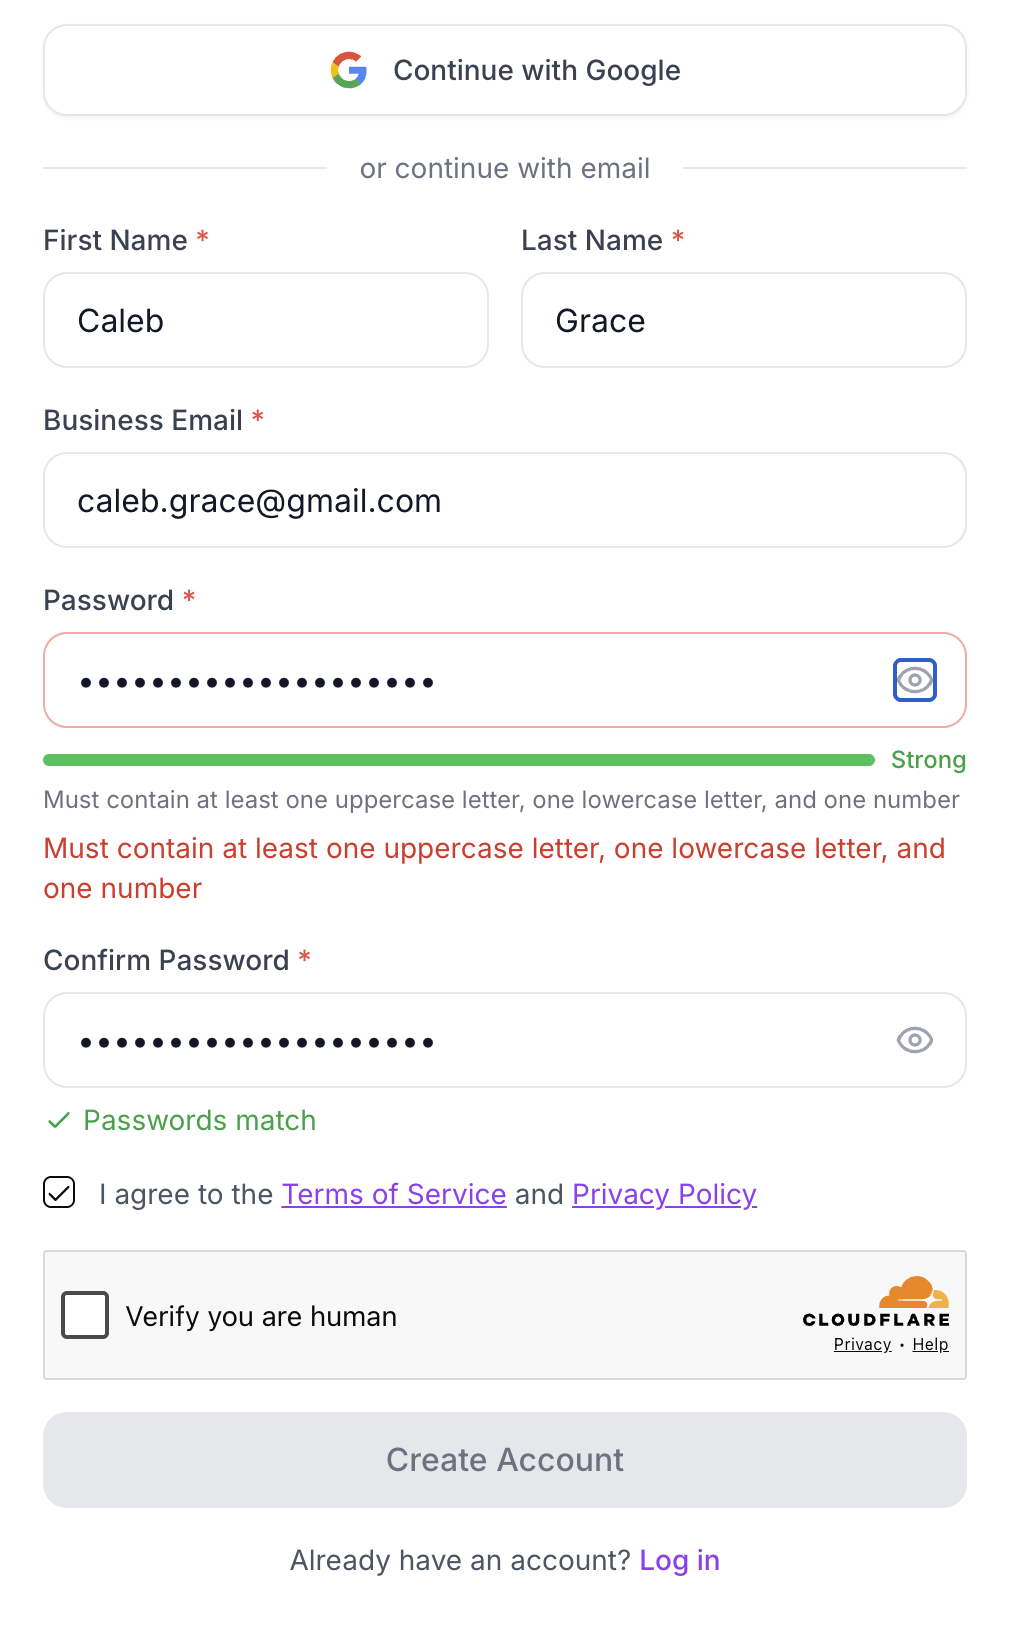
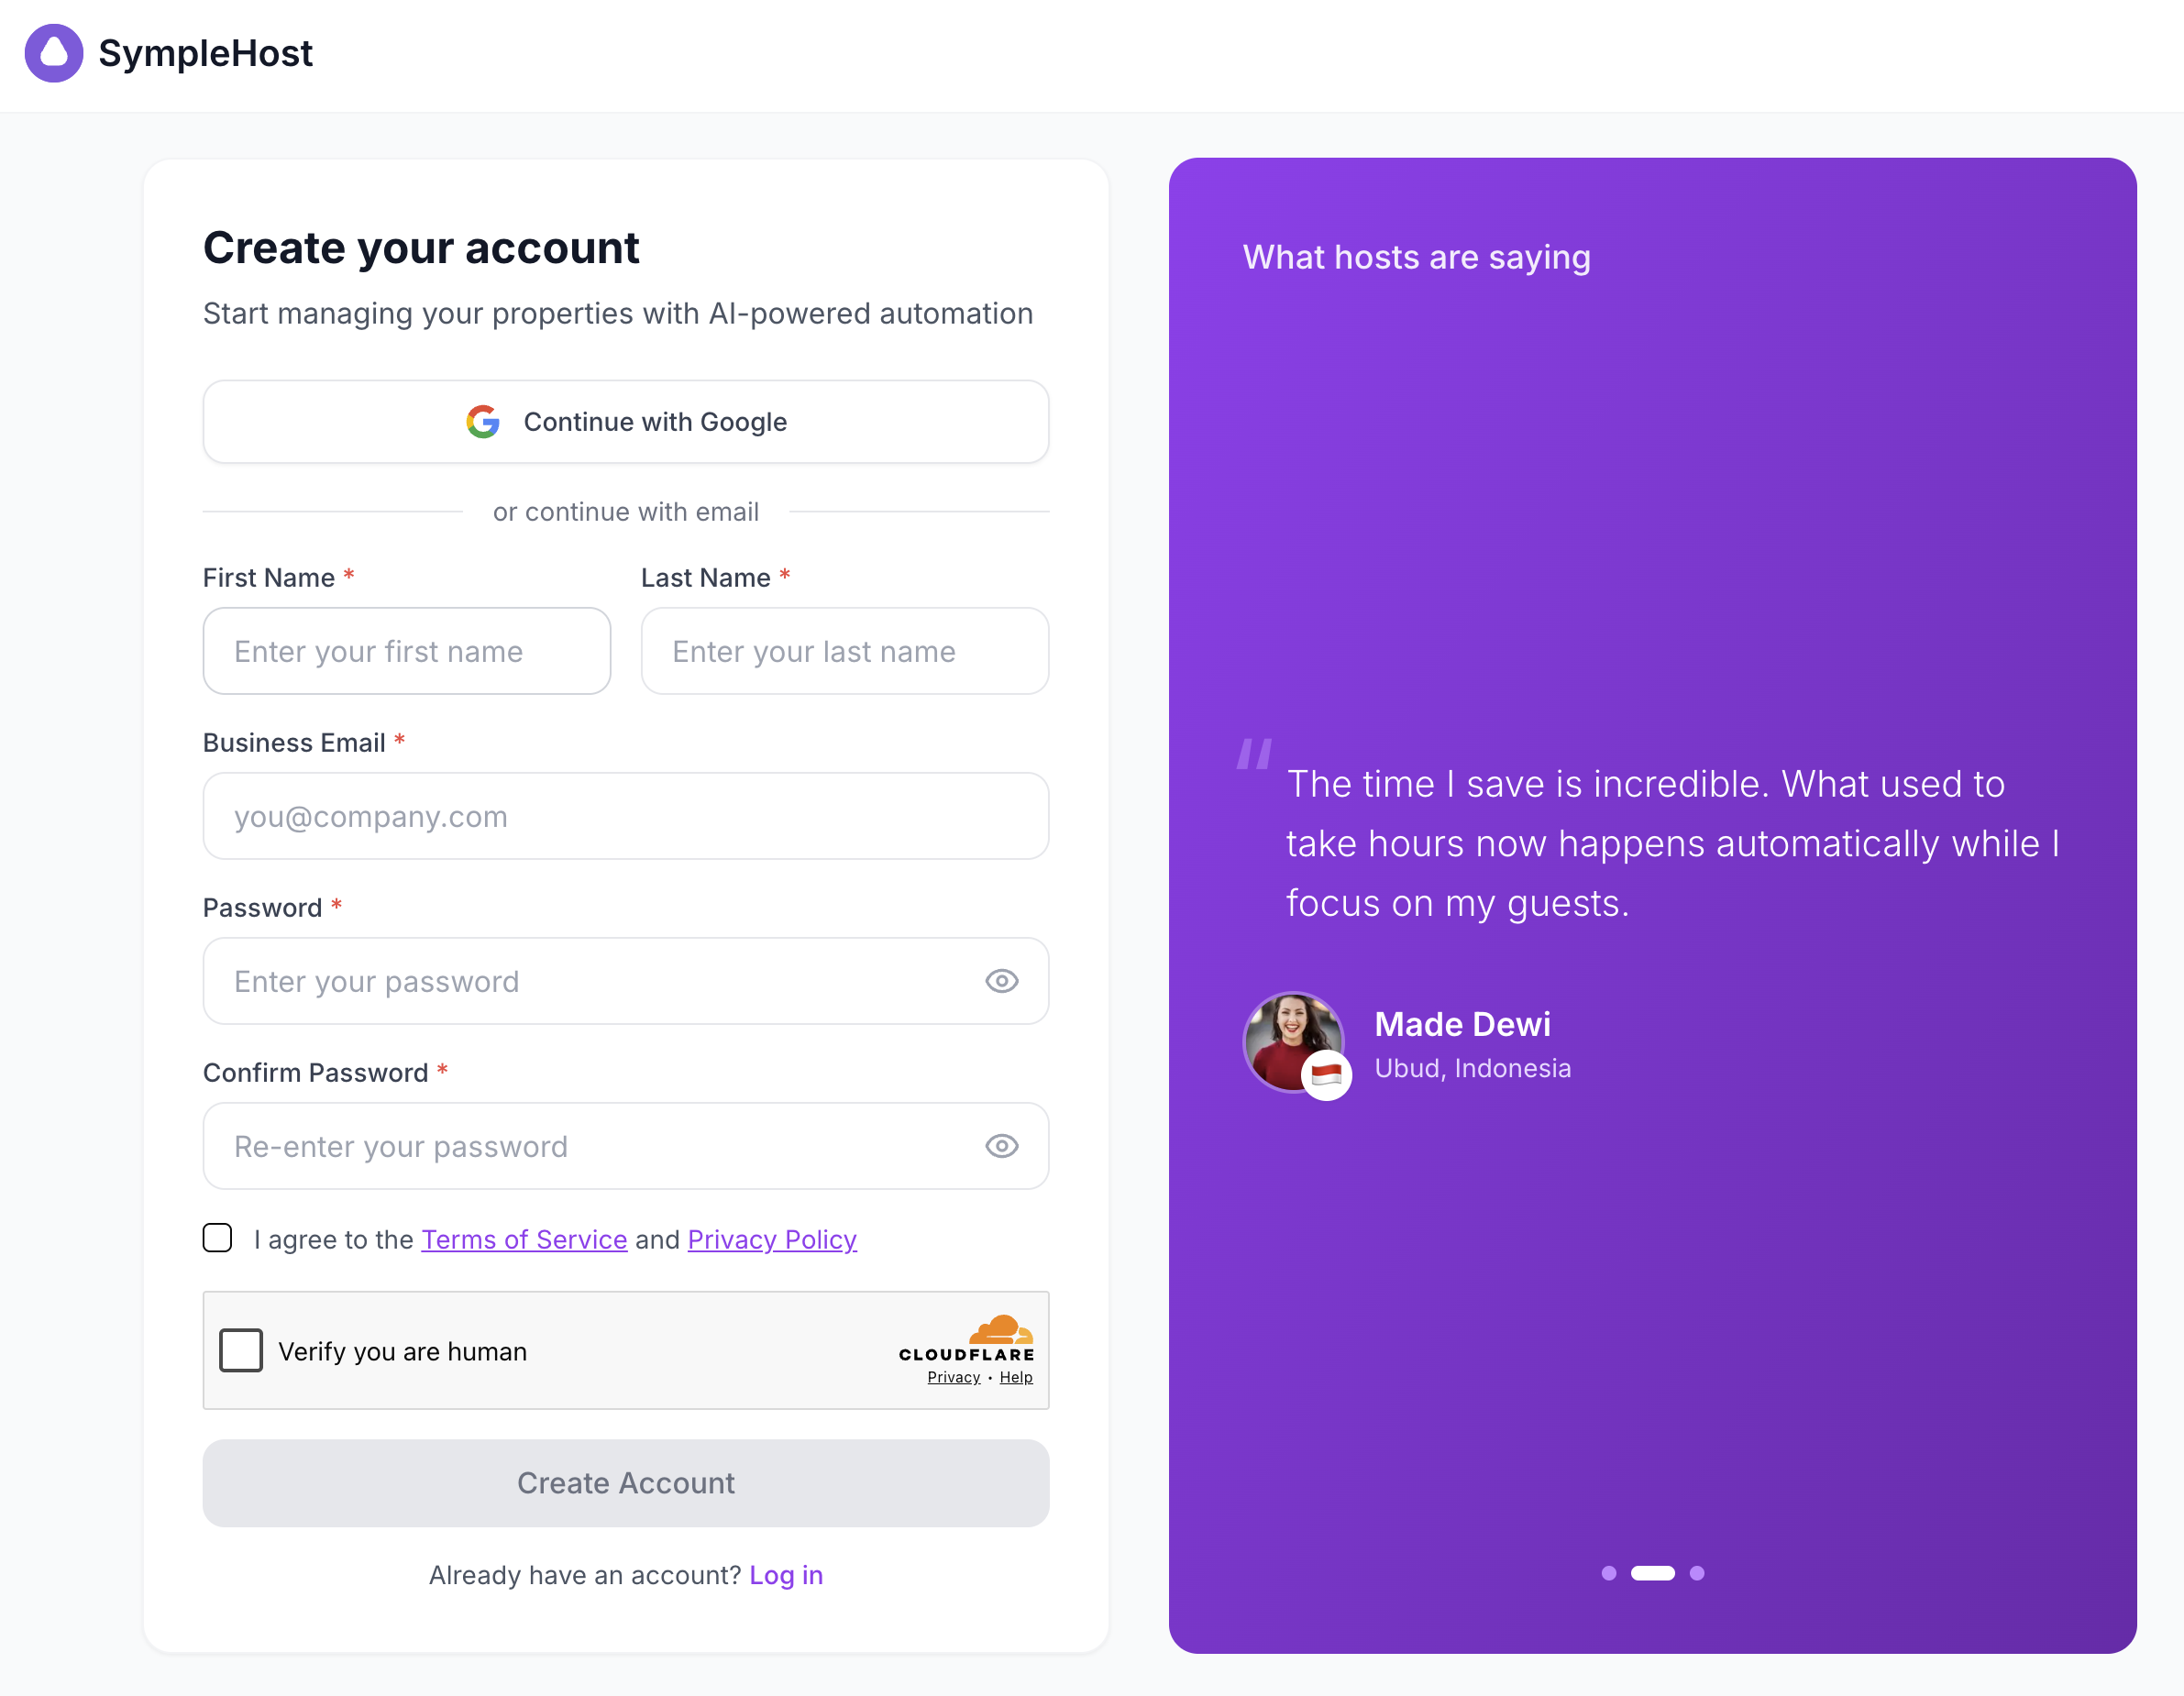
- Go to the SympleHost signup page.
- Enter your Email address, First name, Last name, Password, and Confirm password.
- Check the box to accept the Terms & Conditions.
- Click Sign Up.
💡 Tip: If you received an invitation link from a team member, your email may already be filled in. Just set your password and continue.
Step 2: Set Up Your Profile
- Optionally upload a Profile photo (JPG or PNG, up to 5MB).
- Select your Gender if you’d like (this is optional).
- Choose your Preferred Language from the dropdown — options include English, Indonesian, Spanish, French, German, and Japanese.
- Click Continue — or click Skip to do this later.
Step 3: Enter Company Information
This step sets up your workspace — the account where you and your team will manage everything.
- Enter your Legal Name (your business or registered name). This is required.
- Optionally enter a Business Name if it’s different from your legal name. This will be used as your workspace name.
- Select your Country from the dropdown. This automatically sets your Currency (you’ll see it fill in once you pick a country).
- Your Timezone is detected automatically from your browser, but you can change it if needed.
- Click Continue.
⚠️ Important: Your currency is tied to your country selection. Make sure you choose the right country, as this affects how prices are displayed across your account.
Step 4: Tell Us About Your Scale
SympleHost asks how many properties you manage so it can tailor the experience for you.
- Choose one of the four options:
- 1–5 properties
- 6–20 properties
- 21–50 properties
- 51+ properties
- Click Continue.
Don’t worry — this is just informational. You can manage any number of properties regardless of what you select here.
Step 5: Invite Team Members (Optional)
If you work with co-hosts, cleaners, or managers, you can invite them now.
- Enter a team member’s Email address.
- Select their Role from the dropdown:
- Account Admin — full access to everything
- Account Manager — manages listings, bookings, and guests
- Booking Coordinator — handles reservations and guest communication
- Staff — limited access for task-based work (cleaning, maintenance)
- Click Add to add them to the invite list.
- Repeat for additional team members.
- Click Finish onboarding when done — or skip this step entirely.
💡 Tip: You can always invite team members later from Settings → Team Members.
Step 6: Verify Your Email
- Check your inbox for a verification email from SympleHost.
- Click the verification link in the email.
- You’ll be redirected to a confirmation page — your account is now active.
If you don’t see the email, check your spam folder. You can also click Resend on the verification page (there’s a 60-second cooldown between sends). If you entered the wrong email, click Change email to go back and correct it.
Make SympleHost Feel Like Yours
Your profile photo and your company logo are the two fastest wins for branding your workspace. They show up across the dashboard, team activity, and guest-facing pages — so the platform stops feeling like generic software and starts feeling like your business.
Change your profile photo
Your profile photo appears next to your name in messages, comments, and activity feeds, so teammates and guests can put a face to your name.
- Go to Settings → Profile.
- Click your current photo (or the placeholder avatar) to upload a new one.
- Choose a JPG or PNG up to 5MB.
- Click Save.
Add or change your workspace logo
Your workspace logo appears in the app header, the sidebar, and across guest-facing surfaces like your direct booking website and guest emails — making everything feel branded as yours, not SympleHost.
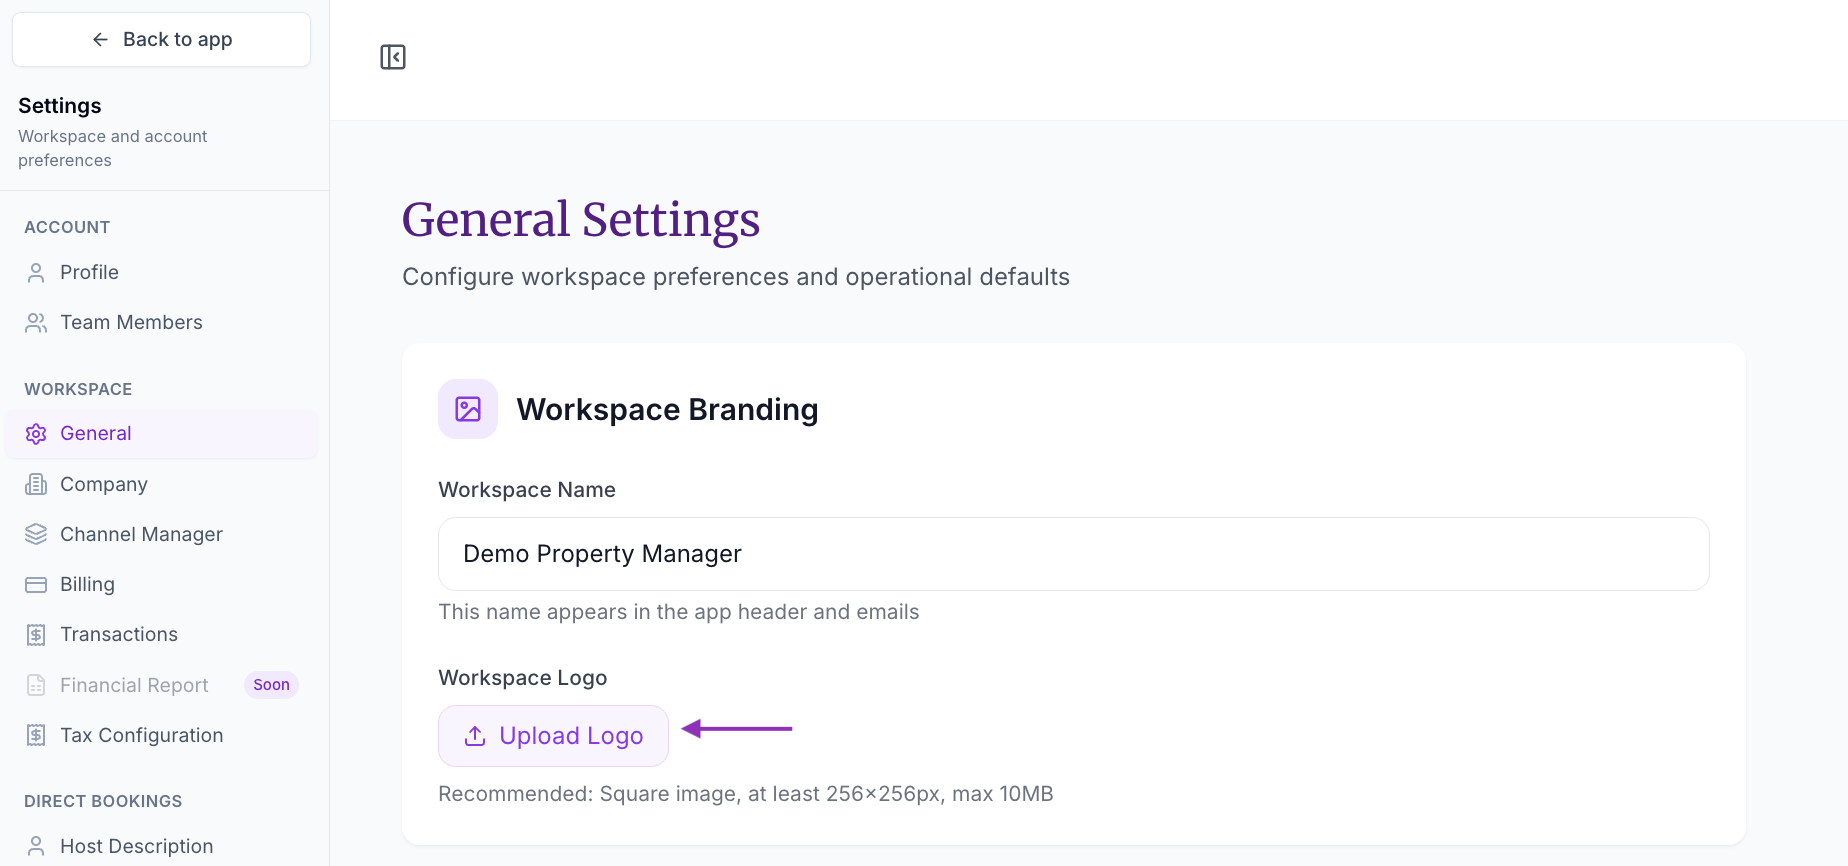
- Go to Settings → General.
- In the Workspace Branding section, click Upload Logo.
- Choose a square image, at least 256×256 pixels, max 10MB (JPG or PNG).
- Your changes save automatically.
While you’re there, you can also update your Workspace Name — it’s what shows up in the app header and outgoing emails, so use what your team and guests will recognise.
💡 Tip: Use a clean, square logo with a transparent background where possible — it’ll render crisply in the rounded slots used across the app.
Troubleshooting
I didn’t receive the verification email
Check your spam or junk folder first. If it’s not there, go back to the verification page and click Resend. Make sure the email address shown (partially masked for privacy) is correct. If it’s wrong, click Change email to fix it.
I accidentally skipped a step during onboarding
No problem. You can update your profile anytime from Settings → Profile, and your company details from Settings → General and Settings → Company.
My currency is wrong
Currency is automatically set based on your country selection. To change it, go to Settings → General and update your country — the currency will update to match.